Unknown's avatar

About stevenmbeard

I am the chair of Musselburgh Camera Club, and also a software engineer at the UK Astronomy Technology Centre in Edinburgh.

03 November 2022 (Colour Print Competition)

This week Neil Scott FRPS of Edinburgh Photographic Society visited us to judge our Colour Print Competition. The club is always delighted to welcome Neil, as he brings us amusing stories about photography. Neil had previously entertained us with two interesting talks, in 2017 and 2019:

Keep It Simple Stupid

The Camera Never Lies

Neil had 39 prints to judge, entered by 13 members. It was apparent that some members were out of practice at mounting prints. Neil recommended that prints be mounted centrally on the mount board with slightly more space underneath the print than above it. However, Neil congratulated the photographer who had made a mount out of a recycled “PermaJet” box. It doesn’t matter what’s round the back of a print, as long as the front looks good.

Neil judged each print based primarily on what the photographer had added through their own creativity. A photograph of a well-known subject, such as Bow Fiddle Rock or the Aberlady submarine, is better when the photographer chooses their own unique viewpoint. The same is true when photographing a beautiful garden or artwork that someone else has created. If the photographer hasn’t added some creative input of their own then the photograph becomes a “record shot”. Neil liked Ross Robertson’s shot of the V&A in Dundee because it wasn’t just a picture of the building: it showed the contrast between the stark lines of the building and the soft, natural flowers in the foreground. He also liked John West’s photograph of a glass vase reflected in a window. An artist had made the vase, but John had captured the distorted lines cause by the window and vase together. Ed Robertson’s “Stained Glass” print also showed a unique view of coloured glass bottles, photographing them from underneath to create a perspective view.

Once creativity had been taken into account, Neil awarded extra marks based on the overall quality of the print. Some prints were let down by their composition and needed more space in the frame. Other prints had shadow areas that needed to be lightened, and some looked too soft and could have benefitted from sharpening, or from a faster shutter speed if the softness was caused by camera shake. The highest marks were awarded to prints that showed both creativity and a high quality. Neil encouraged everyone to keep trying, regardless of their score this evening. Some members showed a good eye for what makes an interesting image, and they could do well in the future with a bit of practice. The top scorers were (in reverse order):

  • 5th place (51 points)
    • Stephen Williams
  • 4th place (52 points)
    • Elaine Gilroy
  • 3rd place (53 points)
    • Joe Fowler
  • 2nd place (54 points)
    • John West
  • 1st place (58 points)
    • George Todd

The top images were:

  • Brown Hare At Rest (George Todd) – 20 points
  • Durbar Monk (George Todd) – 20 points
  • Black Knight’s Shadow (John West) – 20 points
  • Horse Trials (Joe Fowler) – 19 points
  • The Blacksmith (Joe Fowler) – 18 points
  • Walter The Woodturner (George Todd) – 18 points
  • Helenium (Elaine Gilroy) – 18 points
  • V&A (Ross Robertson) – 18 points

Well done to George Todd with an unassailable 58/60 points! Also congratulations to John West and Joe Fowler. And thank you to Neil for judging the competition and entertaining us with his witty stories.

Next week Jean Manson will be visiting us to tell us her “Wildlife Tales from Home and Abroad“. The week after that we have another “Sets of Six” evening, so start thinking of what you would like to bring along.


20 October 2022 (Paul Money: Astrophotography)

This week was another joint Zoom talk hosted by Beeslack Penicuik Camera Club. Paul Money, an astronomer and ‘Reviews’ editor of the BBC ‘Sky at Night’ magazine, connected from Lincolnshire to give us a guide to astrophotography. Paul has written a book on astrophotography called “Nightscenes: Guide to Simple Astrophotography” and mentioned that a new version of that book is about to be published.

Paul began by describing his early forays into astrophotography, using a Zenit film camera and high ISO slide film. Those were difficult days for astrophotography because the relatively low ISOs meant you needed long exposures, and you couldn’t see what you were getting until the film was developed. Paul was enthused by the latest developments in digital photography. His latest Canon camera can go up to 120000 ISO, and even modern mobile phones can now capture hand-held images of the night sky! Canon and Nikon cameras seem to be equally good at capturing good images of the night sky. We were given the following hints and tips for good astrophotography:

  • Turn off the noise reduction in your camera settings. Faint stars look like noise and will be removed.
  • Set your camera to manual exposure and manual focus. Most night shots are too dark for your camera’s autofocus to work properly. You can focus on a bright street light at least a mile away or use the “live view” option on your camera to adjust the focus to make the stars look as small as possible.
  • Most exposures will need a high ISO setting, but Paul recommends going no higher than ISO 1600 to get the best quality. Shots of the Moon or bright planets can be done at lower ISO settings.
  • Use a wide aperture, ideally a stop down from the widest setting of your lens. Paul tends to use f/5 but recommends stopping down to f/11 for scenes which include the full Moon or bright lights.
  • Use a decent tripod so you can take long exposures without camera shake. You can fit the tripod with a ball and socket bracket that allows you to point the camera upwards at any angle.
  • Also use a remote shutter release; preferably one that can make a timed exposure or take several exposures at regular intervals.
  • Don’t use a filter. You need to get as much light into your camera as possible through as few glass surfaces as possible.
  • Use a red light to help you see without spoiling your night vision. You can buy a special red torch or just cover an ordinary torch with a red wrapper.

Paul then gave us a quick introduction to the night sky. The stars rise in the east and set in the west and appear to rotate around the north celestial pole. If you point a camera north and take a long exposure you will see star trails revolving around the pole. The stars tend to move more slowly in the sky around this point, so you can get away with longer exposures before they start to trail. If you point your camera away from the pole the stars will move across the sky more quickly and you’ll need a shorter exposure. The exposure also depends on the kind of lens you are using, with telephoto lenses requiring the shortest exposure. Paul gave us the following guide to maximum exposure time before the stars start to trail:

  • Wide angle lens (18mm): Near the pole (60 seconds), Away from the pole (40 seconds)
  • Standard lens (50mm): Near the pole (30 seconds), Away from the pole (20 seconds)
  • Telephoto lens (135-300mm): Near the pole (20 seconds), Away from the pole (10 seconds)
  • Super telephoto (500mm): Near the pole (2 seconds), Away from the pole (1 second)

Paul took us on a quick-fire, enthusiastic and fascinating tour of various types of astrophotography, ranging from wide-angle shots of the constellations, star trails with foreground objects, telephoto views of the planets, a lunar eclipse, Earthshine on the Moon, noctilucent clouds and shots of the aurora borealis. Paul mentioned that, although most photographers like Adobe Photoshop, he prefers PaintShop Pro. He also recommended StarStax software for combining multiple images of the night sky.

If you would like more information here are some of our previous talks on astrophotography:

Ford Renton: Practical Astro-photography

Andy Bennetts: Astrophotography & Action Photography

Next week we have a Digital Photo Feedback session. This session replaces our old “Photo Advice Night”, which was based on prints. Please bring along up to 6 digital images (or email them to me) to get feedback and advice from other members. See you on Thursday.

Steven

13 October 2022 (DPI competition review)

This week we reviewed the feedback from last week’s Digital Projected Images competition and came up with the following hints and tips on how to improve the images and make the corrections suggested by Doug.

Quality Improvements: Some of the images contained noise, unnatural-looking halos and JPEG compression artefacts. Doug had speculated if these images had been taken on a mobile phone camera. Check the settings of your camera (looking for the gear wheel symbol on a mobile phone) and look for an “Image Quality” setting. If your camera has the option to save to RAW, switch this on. If the camera can only save to JPEG, change the quality setting to “High”, “Large” or “Fine”. If you see an “Image Compression” setting, change it to “off” or “minimum”. Also check the “Image Size” setting and make sure you are saving to the largest size possible. If you find a “Sharpening” setting, turn it off or reduce it to minimum, as the unnatural-looking halos can be caused by over-sharpening in the camera. Some mobile phone cameras have a “Pro” setting which allows you to change more settings when turned on. One of the poor quality images (a soft-focus view of the setting sun called “Pink Evening”) could be saved by reducing the clarity and blurring out the defects. That particular image worked because of the beautiful colours.

Cloning Improvements: Some images contained cloning artefacts, such as unnatural focus changes, duplicated objects or background areas laid on top of foreground objects.

  • Always apply cloning to your images at 100% magnification, so you can see the changes being made. If possible, clone your images in a duplicate layer, so you can erase mistakes.
  • If you are cloning around the edge of a foreground object, first make a selection around the edge of that object and then invert the selection. The selection will prevent your clone brush strokes accidentally replacing parts of the foreground object.
  • Look carefully when cloning and ensure you choose a clone source with the same level of focus as the area being replaced. Ensure there are no unnatural sharp-to-fuzzy boundaries.
  • Look carefully after cloning and look for duplicated objects. Clone these duplicated objects out a second time to remove the evidence of cloning.
  • Lastly, look for any mistakes you might have made during the cloning. Do the boundaries of all the objects still look normal? One of the competition images showing a cricket match looked odd because there was chunk missing from a wicket, showing where the photographer had used Photoshop to move one of the bales. Clone the wicket again to hide that mistake.

Better Composition: Some images were technically good but lost out because of poor composition. The best way to improve your composition is to view the works of other successful photographers, especially those entered for exhibitions and salons. For example, the Edinburgh International Exhibition of Photography 2022, the Dingwall National Exhibition, or the SPF Digital Championship. You can also “Google” for images of specific subjects you are interested in (e.g. “Images of wellington boot plant pots“) and see how some of the stock photos are composed. You will notice the most striking compositions tend to be the simplest, where the subject stands out from the background and isn’t competing with other distractions. Best of luck.

Tonal Corrections: The simplest way to make tonal corrections is to use the “Exposure”, “Contrast”, “Highlights”, Shadows”, “Whites”, “Blacks” and “Clarity” sliders in Adobe Camera Raw. If someone suggests toning down the highlights, try moving the “Highlights” slider to the left. To brighten the shadows, move the “Shadows” slider to the right. To make an image more punchy you can try moving the “Clarity” setting to the right. The “Blacks” and “Whites” sliders can also be adjusted so the image fills the whole histogram. However, when David Clapp spoke to us in March 2022 he told us that he makes his landscape photographs look more natural by lowering the contrast and not including the blackest black or whitest white in his images. So whether the brightness and contrast looks right can be a matter of individual taste.

You can make more specific tonal corrections by using the dodge and burn tools in Adobe Photoshop. Select one of these tools and use it like a brush. Change the “Range” setting to select where you would like most of the changes to be made (highlights, midtones or shadows) and reduce the “Exposure” setting to a small value (15% or less). Using a low “Exposure” setting helps you build up the effect gradually by brushing over the area that needs correcting. The “Burn” tool was used to darken the highlights in the background of one of the portraits without darkening the face.

  • The “Dodge” tool, which looks like a black wand, can be used to lighten areas. Try Range=Shadows or Midtones.
  • The “Burn” tool, which looks like a white hand, can be use to darken areas. Try Range=Highlights or Midtones.
  • The “Sponge” tool, which (funnily enough) looks like a sponge, can be used to change the colour saturation of an area. More about this later.

Lastly, if you have an image that needs a lot of dodging and burning (lots of areas that are too dark or too light) and would lose its punchiness if you just reduced the contrast of the whole image, there is a Photoshop shortcut you can use to save a lot of work:

  1. Open your image in Photoshop and duplicate the background layer by pressing Control+J.
  2. Select the background layer and desaturate it with Image/Adjustments/Desaturate, or by pressing Shift+Control+U.
  3. Now invert the background layer with Image/Adjustments/Invert or by pressing Control+I. You will see a black and white negative version of your original image.
  4. Now blur this black and white layer with Filter/Blur/Gaussian Blur or Filter/Noise/Median (the “Median” option is better if you want to preserve sharp edges). The amount of blurring determines the overall look of your final image. More blurring will give you a more natural look in the end.
  5. Now change the blend mode of this black and layer to “Overlay”. Voilà! You will see an automatically flattened version of your original image. The result might not always work. If you don’t like the look, try changing the blending mode to “Soft Light” or go back the step 4 and change the amount of blurring.
  6. Once the image has been adjusted in this way, you can now increase the contrast without losing the shadow and highlight areas.

Colour Corrections: An image showing a train emerging from under a bridge had a blue colour cast in the smoke. You can check for colour casts in your images by using the “Colour Sampler” tool in Photoshop. It’s the one that looks like an eye dropper next to a crosswire. Click the colour sampler on an area that is supposed to be white or grey and check that the R, G and B values are about the same. If the values are different it suggests a colour cast. (This works even in that frustrating situation when you are colour blind and a judge can see colour casts you missed.) The first thing to try is correcting the colour cast by adjusting the colour balance. You can use the “Temperature” slider in Camera Raw or the “Colour Balance” adjustment tool in Photoshop. Try selecting more than one area that is supposed to be white or grey. If you can correct them all by changing the colour balance then the job is done. But if you are happy with the overall colour and want to remove a cast from just one area (the smoke in this case) you can use the “Sponge” tool mentioned above. Change the “Mode” to “Desaturate” and use a fairly high “Flow” setting.

Sharpness and Focus: We reviewed some of the images which had poor focus or sharpness. It is worth trying the Photoshop “Filter/Sharpen/Smart Sharpen” tool to sharpen your images one last time after reducing them to 1600×1200 pixels for the DPI competition. Set the “Radius” to 0.5 and move the “Amount” slider to recover the fine detail that is sometimes lost when reducing the image size. I tend to use “Amount” in the range 20-80.

It can be really difficult to get the depth of field and sharpness right in a macro image. Poor light, combined with a moving subject, might force you to use a wide aperture or high ISO. Adding more light with the aid of a diffused flash is one way to improve hand-held macro images. There are apps you can use to calculate the depth of field in macro shots: for example PhotoPills. Some members have also successfully used the Topaz Sharpen AI tool to recover detail and correct motion blur (as long as you check carefully for artefacts before accepting the changes it makes).

Thank you everyone who entered the competition. I hope you all got some useful feedback from the experience.

06 October 2022 (Digital Projected Images Competition)

Our first competition of the season took place on 6th October 2022. We were pleased to welcome Doug Berdt of Edinburgh Photographic Society, who had agreed to judge our Digital Projected Images competition. Doug remembered his last visit to Musselburgh Camera Club to judge our Black and White Print Competition in December 2020. You can see a galleries of Doug’s work at the following link:

https://edinburghdoug.com/

There were 54 images altogether, entered by 17 members, with the usual mixture of landscapes, portraits, wildlife shots, sport shots and some interesting abstract compositions. Doug remarked that some of the images were of poor quality and contained halos, noise and JPEG compression artefacts. He wondered if those images had been taken on a mobile phone camera and advised members to save images in RAW format wherever possible. Some images also had unnatural fuzzy areas in their background, which could have been caused by poor cloning. Doug enjoyed the creativity and wide variety of subjects shown and gave us advice on how to create a better composition. A shot won’t work if there are too many competing elements (such as a shot of an entire garden centre display). He recommended isolating just a few elements (such as a small group of interesting plant pots). A composition also works best when there is photographer involvement, which helps the viewer connect with the subject. A picture of people doing something with their backs to the camera doesn’t work as well as people looking at the camera and showing you how to do it. There were some lovely portraits entered, which Doug suggested could be improved by toning down the highlights in the background. There were the usual comments about cropping in to remove distractions and concentrating on the main subject, although Doug felt a shot of a hare and a shot of a sunflower would have been better with a bit more space around them. The top scorers were (in reverse order):

  • 5th place (48 points)
    • Stephen Williams
  • 4th place (50 points)
    • Malcolm Roberts
    • Mike Clark
  • 3rd place (51 points)
    • John West
  • 2nd place (52 points)
    • Carol Edmund
  • 1st place (54 points)
    • George Todd

The top images were:

  • Eyes Focused on the Next Gate (George Todd) – 20 points
  • Paddington Station (John West) – 19 points
  • Far Away Look (Carol Edmund) – 19 points
  • Kingfisher On The Rocks (Malcolm Roberts) – 18 points
  • First To The Bend (George Todd) – 18 points
  • White Tailed Sea Eagle (Mike Clark) – 18 points
  • Forth Bridge (Gordon Davidson) – 18 points

Well done to George Todd, Carol Edmund and John West on your well-deserved medals. And thank you to Doug for judging the competition.

Next week we will go through the competition images a second time, with more opportunity for feedback and questions. Also, don’t forget to bring your 3 mounted prints for the Colour Print Competition.


29 September 2022 (Tesni Ward: Wildlife Photography)

This week, in a joint Zoom talk hosted by Beeslack Penicuik Camera Club, wildlife photographer Tesni Ward told us about her experiences in wildlife photography. Tesni is based in Sheffield. She first took up photography in her childhood as a way of encouraging her father to spend less time setting up photographs in a theme park and more time taking her on the rides! Her interest in wildlife photography began with a photographic holiday to Alaska, where she had the opportunity to see bears in their natural habitat. Her trip was spoiled when her main telephoto lens was damaged in flight. She saw other photographers taking superb clear shots while she ended up deleting hundreds of blurred attempts, and vowed never to be caught out by substandard equipment again. She learned from her experience with a damaged lens not to rely solely on long-distance telephoto shots. Tensi now takes shots at all focal lengths, with her wide angle shots taken after days of patiently getting to know her subjects and winning their trust. Tesni became a professional wildlife photographer when she was made redundant from her job, coincidentally just after buying new equipment and booking an African wildlife safari. A conversation with another photography on the trip convinced her to take the opportunity to change career and make a living from what she loves doing.

Tesni treated us to a breathtaking slide show of her photographs; ranging from her early shots of bears in Alaska, her photographs of big cats on her African safari, her shots of pelicans and coypu on a trip to Greece, and mountain hares, pelicans and seabirds closer to home. Each image came with a story of how Tensi had waited for hours for the light to improve, or how she had crawled over frozen mud to get to the correct spot. Other photographers sometimes laughed at her tenacity, but she eventually achieved the shot she wanted. A selection of these images can be seen in Tesni’s gallery (below).

During the tea break we had the opportunity to find a bird hiding amongst a photograph of jumbled rocks. Although several members could identify something strange in one part of the frame, it was Mike Clark who managed to home in on the exact spot. Well done Mike.

Tensi encouraged us all to try wildlife photography. You can check her web site to find out more about her workshops. She encouraged us not to be snobbish about the subjects. Shots of geese, ducks and pigeons are just as important as shots of pelicans and swans, as these creatures are just as important to their environment and might one day become rarer. All in all it was a very enjoyable and entertaining talk. Tensi showed us all just what can be achieved with a little determination and tenacity.

Next Thursday, 6th October 2022, Doug Bernt will be judging our Digital Projected Images competition. George Todd will also be collecting prints for the Colour Print competition. Please bring along your 3 mounted prints, if you haven’t already given them to George.

See you there,

Steven

22 September 2022 (George Robertson: The Snows of Kilimanjaro)

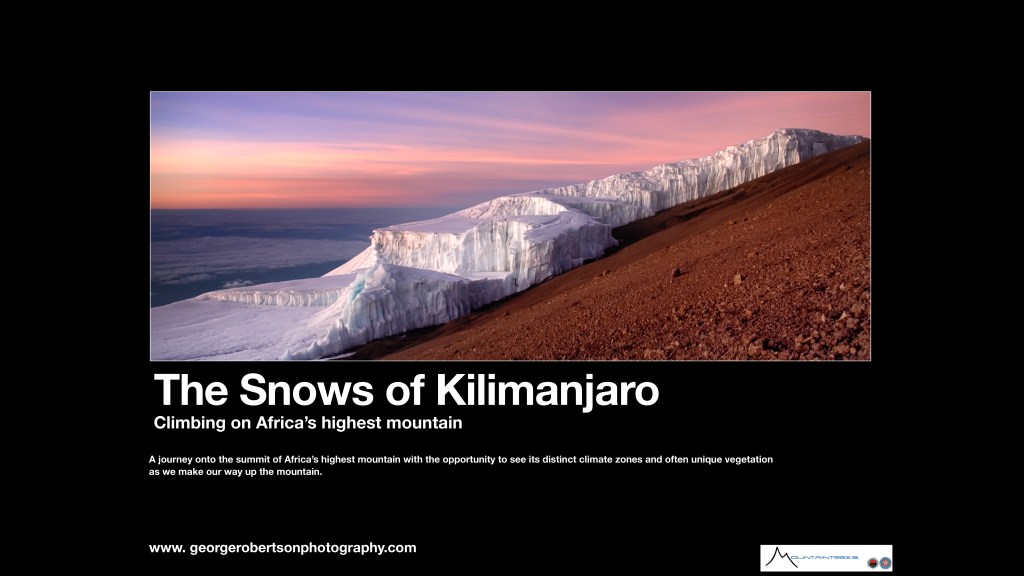
This week we had our first speaker of the season. George Robertson, who last year gave us a fantastic talk on his journey to K2 in “Into the Throne Room of the Mountain Gods”, returned to talk about “The Snows of Kilimanjaro, Climbing on Africa’s Highest Mountain”. George’s talk was shared with Beeslack Penicuik Camera club, with some Beeslack members opting to join us at the Fisherrow Centre and others opting to join by Zoom. George began his talk by repeating the introduction he gave us last year, explaining how his photography had begun from a need to record the experiences of the clients on his mountain adventure treks. You can find out more about George Robertson’s photography and mountain adventures on the following web sites:

https://georgerobertsonphotography.com/

https://www.mountaintreksphotos.co.uk/

http://www.mountaintreks.co.uk/

George first showed us a map of the routes he uses to take his clients to the summit of Kilimanjaro. His talk would show us highlights from two routes to the summit: one beginning at Machame and the other from Rongai. He explained that climbing Kilimanjaro is not a cheap option: it takes 6-7 days to complete the climb, and costs $120 per day to stay in the national park.

George’s trek began with civilisation and then moved up though the rainforest zone, with some beautiful photographs of the plants and wildlife visited on the way. The route then rose above the clouds and made way for moorland vegetation, and we started to see some spectacular views of the mountain ahead. George showed us pictures of the campsites, which had toilet blocks teetering on the edge of cliff! As George’s party climbed higher, the photographs became ever more spectacular; gazing across the clouds to the summit of Meru. We were taken into the Alpine Desert zone and shown pictures of a huge lava tower and the steep cliff face of the Barranco Wall, the hardest part of the climb. Eventually, we were treated to jaw-dropping shots of the icy glaciers on the mountain summit at sunrise, atmospheric shots of cloud formations, night shots of the campsite, and unique views of a rainbow surrounding a nearby peak and the Kilimanjaro’s shadow against the clouds. The final shot from the summit was of an American tourist sitting at the summit reading Ernest Hemingway’s “The Snows of Kilimanjaro”. George finished by showing us the route down the mountain back to the exit at Marangu. This time, more members were able to chat with George face to face after the talk. Another fascinating talk.

Next week we will be sharing a another speaker with Beeslack and will be treated to a wildlife photography talk from Tesni Ward. Tesni will be talking to us on Zoom, but her talk will be broadcast at the Fisherrow Centre (starting at 7:15 this Thursday). Zoom information will follow in due course.

See you there,

Steven

Our next meeting: George Robertson’s presentation on “The Snows of Kilimanjaro”

Our first speaker of the club season, George Robertson, will be visiting the club this week to give a talk entitled “The Snows of Kilimanjaro, Climbing on Africa’s Highest Mountain”.

The talk will be shared with Beeslack Penicuik Camera club. George will arrive in room G3 of the Fisherrow Centre at 7pm, and the talk itself will start at 7:15pm. You can find out more about George Robertson on the following web sites:

https://georgerobertsonphotography.com/

https://www.mountaintreksphotos.co.uk/

http://www.mountaintreks.co.uk/

George gave us a talk last year entitled “Into the Throne Room of the Mountain Gods” which was enthralling and entertaining. Click below to read more about it.

I look forward to seeing you this Thursday. We are in for a treat.

Steven

08 September 2022 (Introduction to Photography and Printing)

We had our second club night of the new season on Thursday, 8th September 2022, where Steven Beard, Joe Fowler and Charlie Briggs gave an introduction to photography and offered hints and tips to members. Gavin Marshall was the only member attending by Zoom.

The meeting began with Steven Beard giving a shortened version of his “Introduction to Photography” presentation. The presentation offered new members advice on composition, focus, exposure and colour. A PDF of the presentation is available on the club web site and may be downloaded by clicking the link below:

A much more detailed version of the presentation can be downloaded in several parts from this club web page:

Steven also gave members a brief introduction to the club competitions, which can be downloaded by clicking the link below:

Joe Fowler then showed members a series of images and explained why some shots worked and some didn’t. Joe explained that long exposure shots of rivers and waterfalls work better when the exposure time is just a few seconds or shorter, as longer exposures tend to burn out the water and remove detail. Shots of stunt riders (or birds) in the air worked better when there were fewer distractions in the background. Joe showed how he used the clone tool in Photoshop to remove the distractions. He had used this tool to construct a tight composition of boats at Fisherrow harbour or remove distractions from the edge of a shot of sea birds on Bass Rock. Joe finished with a motorbike racing shot which had won him “best image” at the Borders Digital Challenge. The image was constructed from 3 separate riders placed together using layers, with background distractions cloned out or blurred. Joe always take a shot of someone wearing a clear face visor so he can clone their eyes onto riders who insist on wearing black visors.

In our third presentation of the evening, Charlie Briggs explained how he prepares his images for printing. He begins with a calibrated monitor, so he is better able to judge the colours of his images. He also calibrates his printer and uses top quality printer paper. Charlie explained that the same image looks very different when shown on a screen or printed on paper. An image on screen is made by adding light to a dark background, but an image on paper is made by adding dark ink to a light background. An image which looks great on the screen will tend to look a bit dark and drab when printed. Charlie uses the following Photoshop tip to correct for the different.

  • Start with an image which looks good on the screen.
  • Open the image in Photoshop.
  • Click on the background layer and uses CTRL/J to duplicate the layer.
  • Select the duplicated layer and change the blending mode to “Screen”.
  • Adjust the opacity of the duplicated layer to around 20-25%.
  • Now print the image and see the difference.

Charlie showed members some example prints which showed how this method brightens the result and makes the prints punchier. This technique will be very useful for the Colour Print competition submission on 13th October 2022.

Here are some additional announcements since opening night:

  • Please don’t forget to contact Stephen Williams (sgpwilliams@outlook.com) to rejoin the club.
  • There is a PAGB award presentation this Sunday, 11th September at 1pm. Please email Steven Beard or Stephen Williams for the Zoom information if you would like to attend.
    Check here for details: http://www.thepagb.org.uk/awards/apm-awards/
    (NOTE: The Musselburgh Communities event was cancelled. I don’t know the latest status of this PAGB event.)
  • There is an astrophotography special Sky at Night being broadcast on Monday, 12th September at 10pm on BBC4. The program features some video images which I submitted to the BBC!
  • Our next meeting on September 15th is our first “Sets of Six” evening. Please bring along up to 6 images, or one video, to show club members. The night is also an opportunity to present a useful trick or technique (such as Charlie’s printing trick) that other members might find useful.
  • Please submit you 3 JPEG images for the Digital Projected Images competition to Geroge Todd (georgetodd1957@me.com) by 15th September.

I won’t make it to the next meeting, but I’ll see you all in 2 weeks for our first speaker of the season: George Robertson.

Steven

Welcome to the 2022-2023 Season!

Our first club night of the new season began on 1st September 2022, where we were happy to introduce some potential new members to the club. For the first time since 2019 we had all the attending club members in the same room! We took the opportunity to chat over tea and biscuits, catch up, and look at some of the work that club members had produced over the last year. I gave a presentation which introduced members to the new club programme:

There have been some changes to the club meetings since the last season:

  • There are no longer compulsory covid restrictions at Fisherrow, although members are welcome to wear a mask and use the hand sanitizer. We are still intending to broadcast the meetings by Zoom but hope that most members can join us in person.
  • Our club meetings now start at 7pm, which allows more time for tea and coffee before the 9pm Fisherrow closing time. Meetings which involve another club might start later, so check your programmes.
  • The club has a new, faster laptop with a high-resolution screen!
  • Our print competitions are back to normal, which means that we are back to accepting 3 mounted prints plus 3 JPEGs.
  • The storage space at Fisherrow is being reduced. We now have a new cupboard in room G3 which will store our most commonly used items. The club lighting equipment will be moved to the cupboard under the stairs.

During the meeting I gave the following announcements:

I hope you all enjoy the new season. Please don’t forget to contact Stephen Williams (sgpwilliams@outlook.com) to rejoin the club.

28 April 2022 (AGM and Presentation of Trophies)

The 2020/22 Musselburgh Camera Club season ended on 28th April 2022 with the AGM and the presentation of trophies. This season we have been presenting our meetings in a hybrid format where they are hosted at the Fisherrow Centre but broadcast live by Zoom, which has given members a choice of how to attend. Zoom has again allowed us to reach out to judges, speakers and clubs who would normally have been too far away to visit us. For example, we had another live meeting with Mölnlycke Fotoclubb in Sweden. Zoom also gave us the added bonus of being able to share some speakers with Beeslack Pencuick Camera Club. The hybrid format and remote judging meant that most competitions were still in a digital format, although this year’s Human Portrait Print Competition gave members an opportunity to practice printing and mounting. We hope club meetings will return to a more normal meeting format next season, although we will be keeping the Zoom option because of the opportunities it brings.

Members had an opportunity during the evening to suggest and vote for the topics for next year’s set subject competitions. The top results were:

  1. Castles
  2. Wildlife
  3. Landscape
  4. Black & White

The AGM finished with a presentation of trophies and medals to those present in the room and with trophies delivered to those who attended by Zoom. The full list of winners can be found on the following page:

Trophy Winners – 2021/2022

Although the AGM brings the formal 2021/22 season to an end, there will be informal meetings by Zoom every Thursday evening throughout the summer. We have also restarted our summer print exhibition in local libraries, with a schedule on the following page:

2022 Library Exhibitions

Our first meeting of the 2022/23 season will be on Thursday, 1st September 2022. We have another programme packed with local and remote speakers to look forward to. I hope to see you then.

Steven Beard